Posted by Shari on October 11th, 2014
| Free Motion Quilting Fun |
| Greetings Fellow Quilters! It’s Karen from Redbird Quilt Co. and Karen’s Quilts, Crows, and Cardinals blog. It’s a pleasure to be guest posting here at the Bear Creek Quilting Company's blog. Ready to have some fun?! |
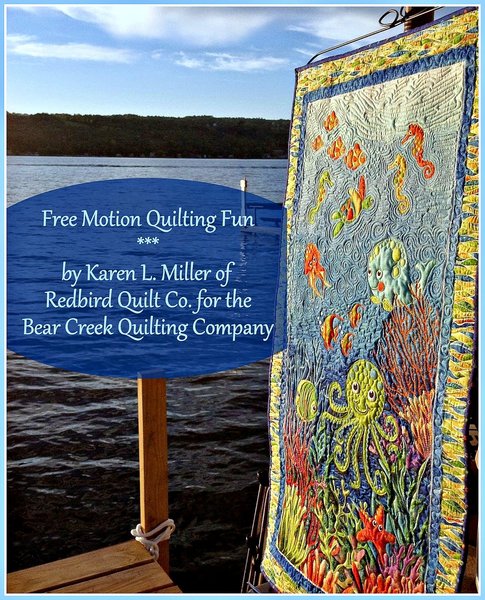 |
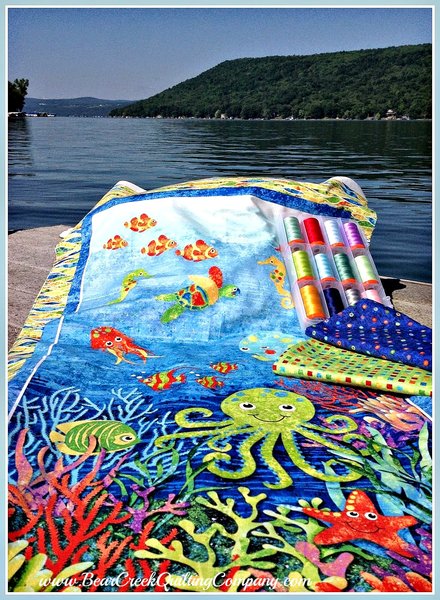
| Have you wanted to learn to free motion quilt (FMQ)? Are you a bit nervous about learning on a quilt that you've spent hours and hours piecing? - or - Have you started quilting your own projects but feel you need more practice? Consider practicing your FMQ on a fabric panel. They're fairly inexpensive, you'll get tons of practice, AND when you're done, you'll have a sweet little gift for a loved one. Are you in? Lets get started... This tutorial uses a beautiful panel by Linda Ludovico for the Northcott Stonehenge Kids Collection. It's called "Undersea Adventures". |
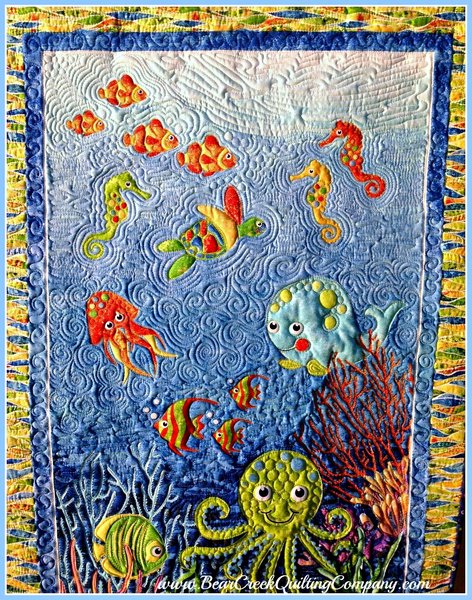 |
| Use your choice of panel to practice your FMQ, add a hanging sleeve and binding, and you’re set to gift it to someone special. Beautiful color, lots of texture, and educational too!! Are you ready? Let’s have some fun! |
 |
|
Tutorial Supplies - Fabric:
|
|
Tutorial Supplies - Complimentary Colored Threads:
|
|
First things first: If you’re new to Free Motion Quilting be sure to jump over to my blog and check out the tutorial: “Do you FMQ – The Process”. It’s a fun post that outlines 10 steps to getting started with Free Motion Quilting. If you have any questions please send me an email – I would be happy to help you along. |
 |
|
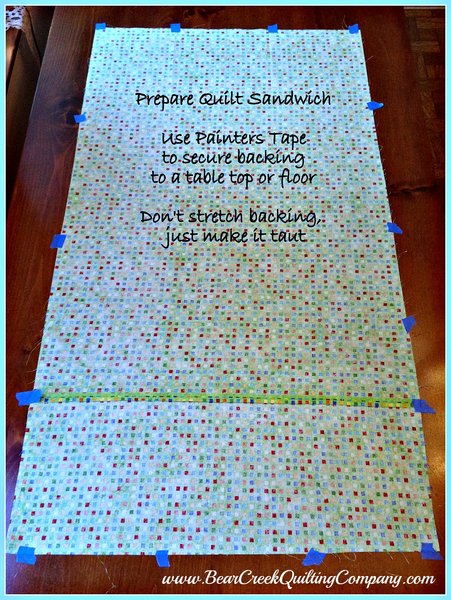
Preparation: Piece the backing to be at least 26” wide by 50” long. The extra width and length allows you to control the movement of your quilt sandwich while you quilt. Ideally, cut your batting slightly smaller than the backing – about 25” x 49”.In the sample I used two layers of batting – one layer of Warm and Natural 100% Cotton and one layer of Hobbs Heirloom 100% Wool. The cotton batting provides stability to the finished piece and the wool adds loft and texture for your quilted areas. Press your panel flat – avoid stretching or distorting it. Secure your backing fabric right side down to a large table or floor with masking or blue painters tape. Don’t stretch it too taut. |
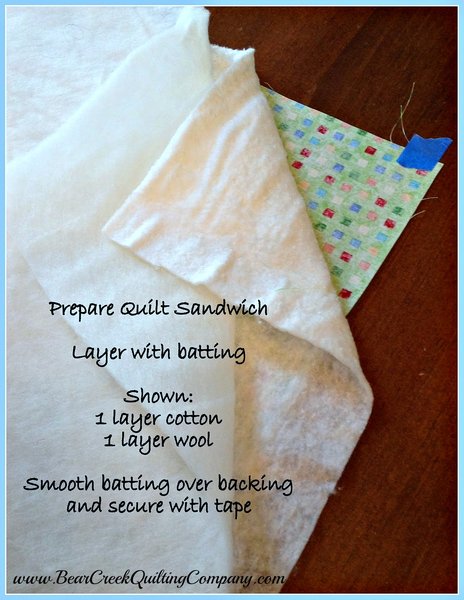 |
| Layer, smooth, and tape the batting on top of the backing. I placed the cotton batting against the baking fabric, and the wool batting against the panel. |
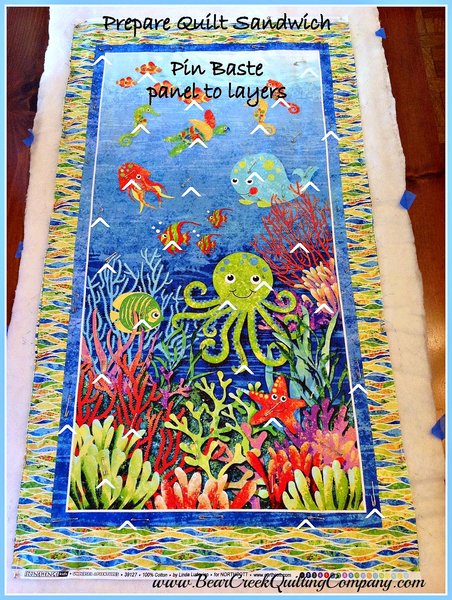 |
| Layer, smooth, and pin baste your panel to the other three layers using Dritz Curved Safety Pins. Start pinning in the center and work your way toward the outside, pinning and smoothing outward as you go. The white arrows below give you an idea of where the pins are located. There are also pins around the perimeter of the outer border. |
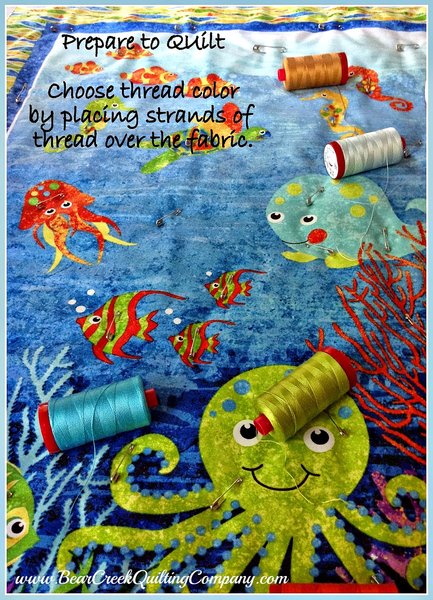 |
| Choose Top Thread Color – Rule of Thumb: Unwind the thread from the spool when selecting a color – if you don’t have an exact match, choose a color that is slightly darker – it will blend better. |
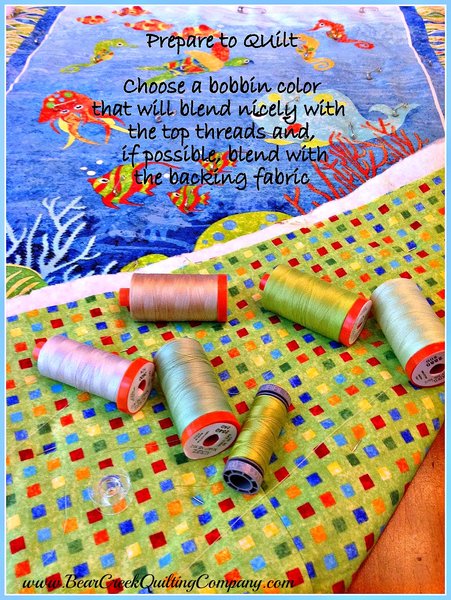 |
| Choose Bobbin Color(s) – Rule of Thumb: Use a bobbin color that matches the top thread. On this quilt, I changed top thread colors a few times – so I decided to stay with the Aurifil Mako Cotton 50Wt Color #2145 in the bobbin for most of the quilting. If your tension is set right – it should NOT show through to the top. |
 |
|
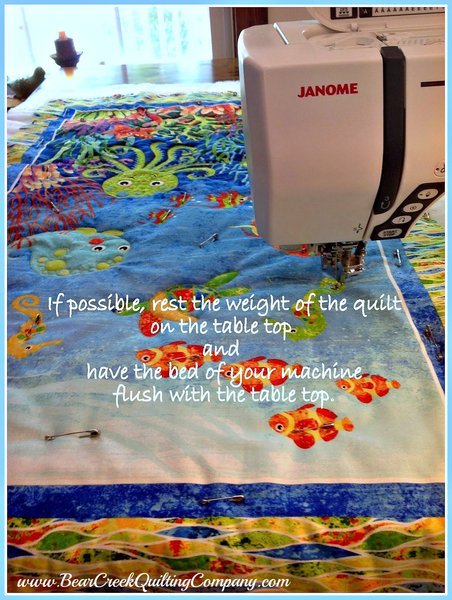
Quilting Steps: Basics from the blog tutorial mentioned above:1. Machine bed flush with the table 2. Feed dogs dropped or covered 3. Use a pair of Machiners or Garden gloves 4. Needle in down position when you stop stitching |
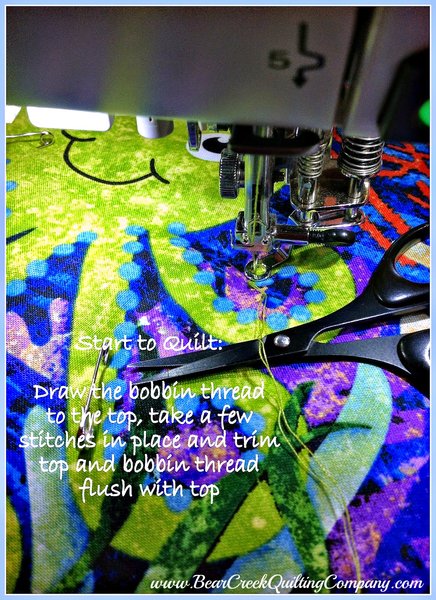 |
| You can start with 50Wt Aurifil Color #1231 in the bobbin and 28Wt Color #1147 top thread – use a size 90/14 needle with the heavier weight thread. Start near the middle of the panel and prepare to outline the larger sea creatures - no need to quilt directly on the line, just get near it. When you start a new area, bring your bobbin thread up, take a few lock stitches(in place) to secure the threads, and then leaving the needle in the down position, trim the top and bottom threads flush on top. |
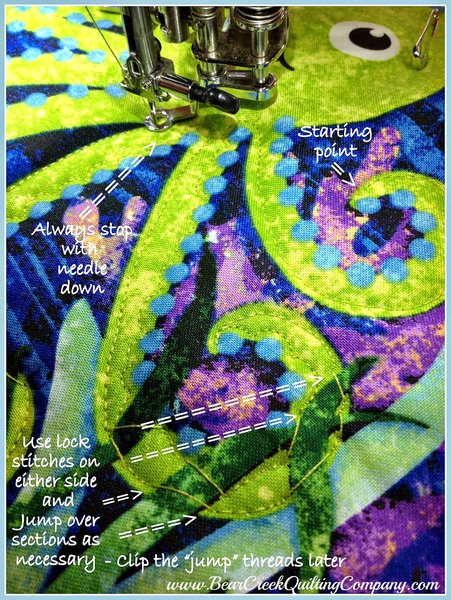 |
| As you quilt, if there is a section or an object you want to skip, work your way to the edge of that section or object, take a few lock stitches (quilt in place), raise the presser foot, and slide the fabric to the next starting spot. I call it "jumping" over a section. It saves time and thread. Once you've "jumped" to the new section, lower your presser foot, take a few lock stitches and off you go! You can go back later and trim your stitches from the top and bottom. |
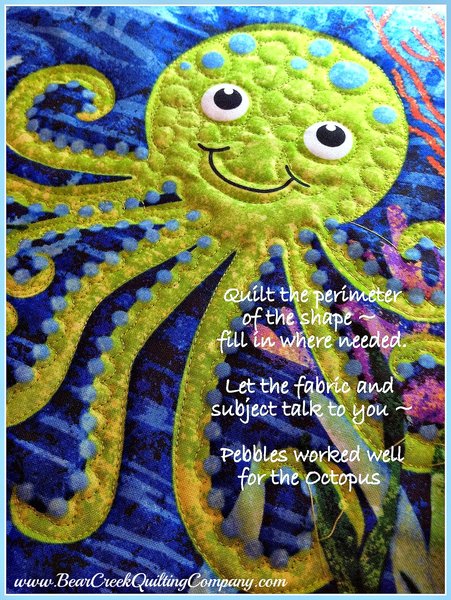 |
| Once you finish stitching around the perimeter of an object, work your way inside to add accents. **Let the fabric and the object help you decide what to quilt.** The circular fabric on the octopus called out for quilted circles or pebbles -- they worked out well. |
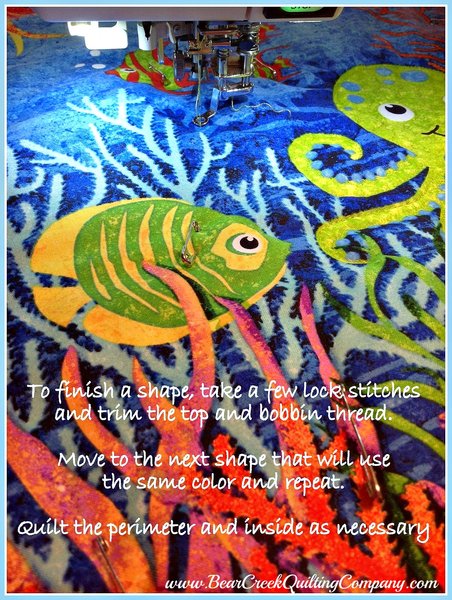 |
| When you’re done with an object, lock your stitches and "jump" to the next object or lock stitch, trim threads and start fresh on a new object. Normally you would work your way from the inside of a quilt toward the outside -- to save time on this "practice" piece I quilted all objects that used the same top thread color. |
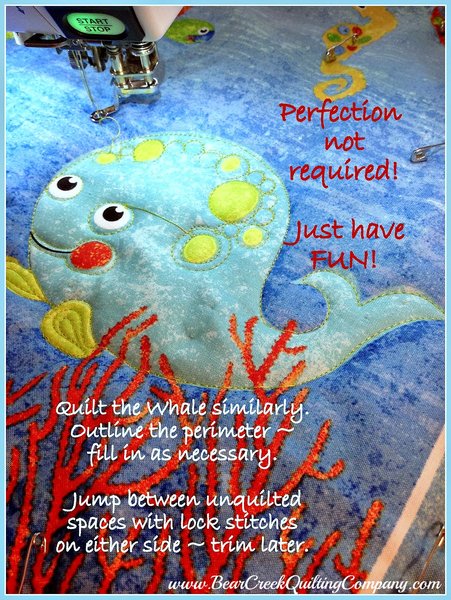 |
| When you're done quilting the fish, move on to the Whale. Take a few minutes and plan your route, trying to minimize backtracking if possible. Remember to “jump” over spaces you don’t want to quilt – go back and trim threads later – it saves time. |
| A Note about backtracking: If you're using a 50Wt thread, backtracking is nearly invisible; however, with a 28Wt thread, the backtracking shows a little more. |
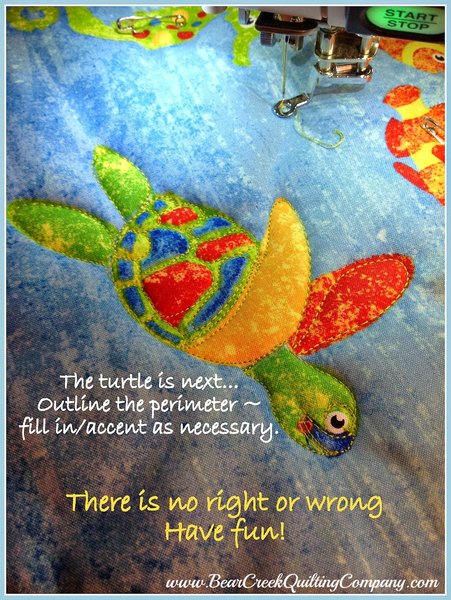 |
| Next up, turtle… stitch the perimeter and fill with accents as necessary. |
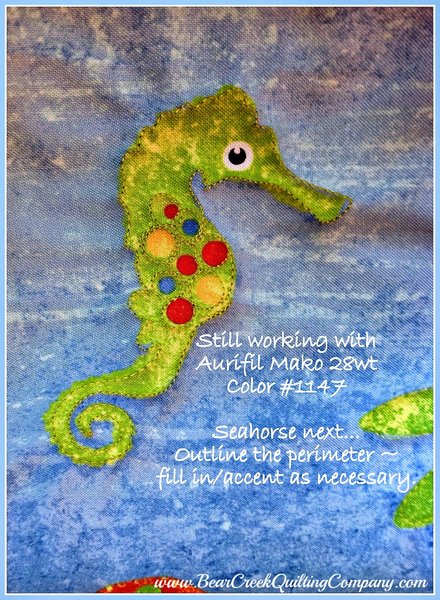 |
| Ah, Mr. Seahorse is next – you know the drill! |
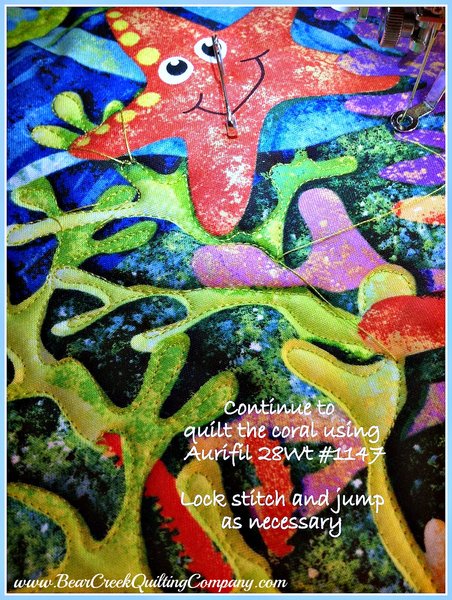 |
| Now we’re moving down the panel to the various green colored Sea Coral – stitch around the inside perimeter of the coral near the line, jumping over sections as necessary. |
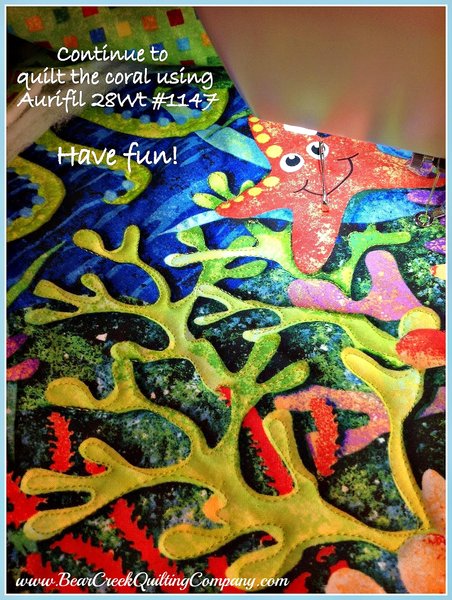 |
| Here is an image with the threads cut. |
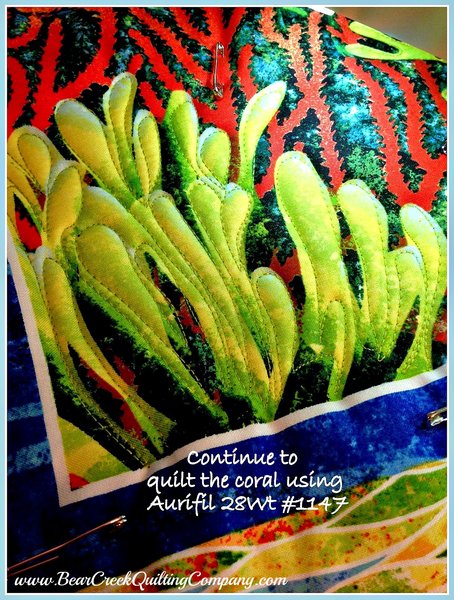 |
| Bottom left of the panel – more Sea Coral that you can quilt with Aurifil #1147. |
| Congratulations! That was a lot of quilting!! |
| NOTE: It's very important to stand up every 20 or 30 minutes and stretch your body. You don't want to feel like a baked pretzel when you're done quilting. |
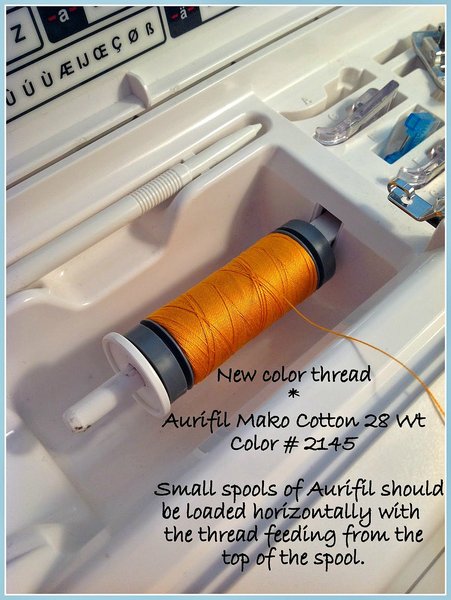 |
| Before removing color #1147, take a final scan of the panel and quilt any remaining "green" colored areas. The next thread color is Aurifil Mako Cotton 28Wt color #2145. Note: Small spools of Aurifil thread should be loaded horizontally with the thread coming off the top of the spool or according to your sewing machine manufacturer instructions. |
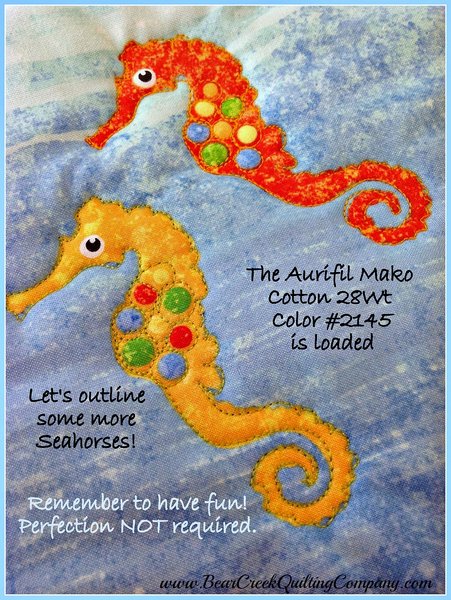 |
| This beautiful color thread works nicely with the next set of Seahorses – outline and accent – jumping between the two and clipping threads later. |
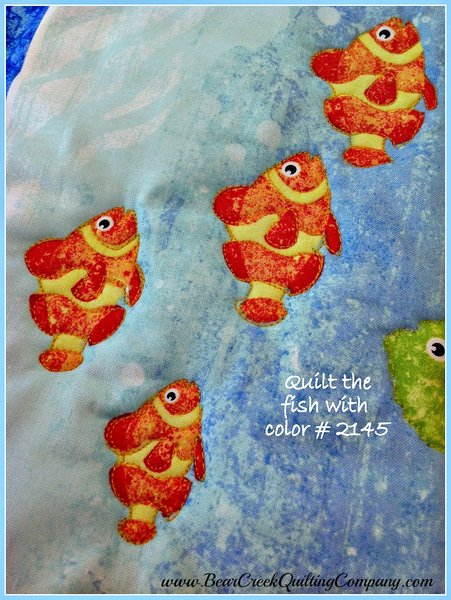 |
| Little clown fishes are up next – if you want them to be slightly raised, don’t quilt each one of their stripes, skip some. Jump from fish to fish to save time – clip threads later. |
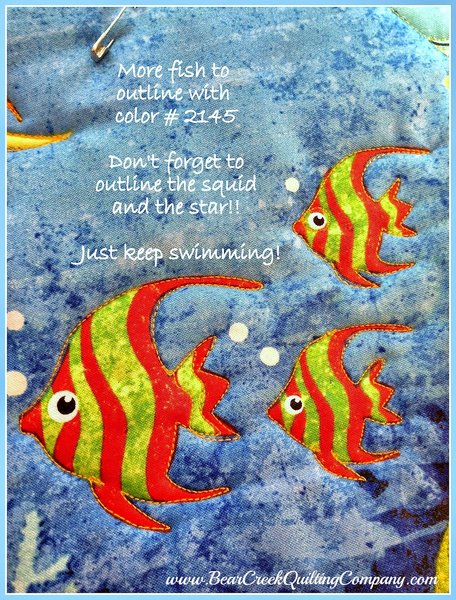 |
| Moving on... we're swimming toward the Angel Fish. When they are done – be sure to quilt the Squid and the Star… Sew much fun! |
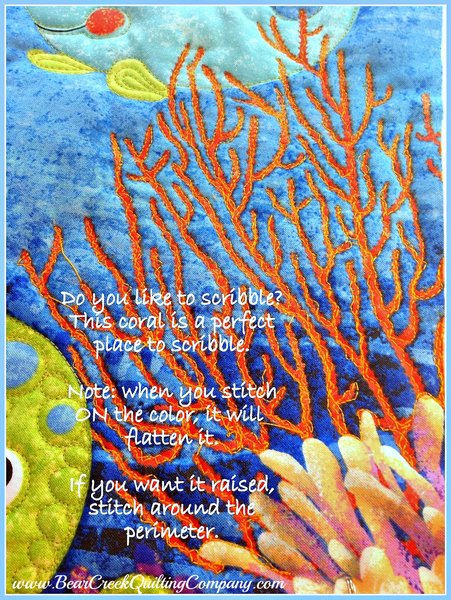 |
| Next up this pretty Spiny Coral – you can quilt a single line through the middle, or quilt around the perimeter, or do what I did and scribble on each piece of spine. Jump as necessary and trim later. |
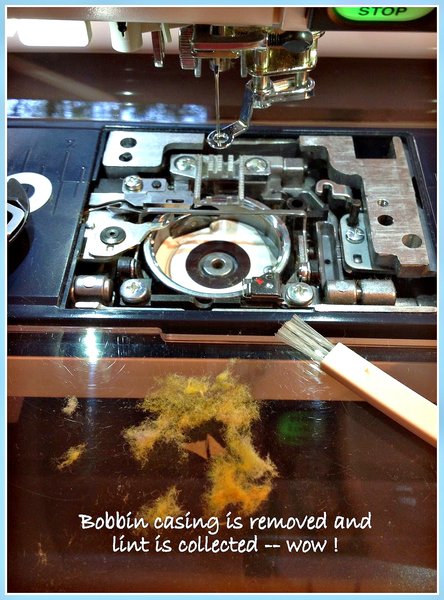 |
| When your bobbin runs out, it’s a good time to clean your machine. On the Janome Horizon, you do NOT need to oil – just remove the faceplate, dust, remove the bobbin casing and dust some more. Avoid blowing into the crevices of your machine – that will push the lint deeper. Use a skinny lint brush or a pipe cleaner to gather up the lint (with caution and per manufacturer recommendations). |
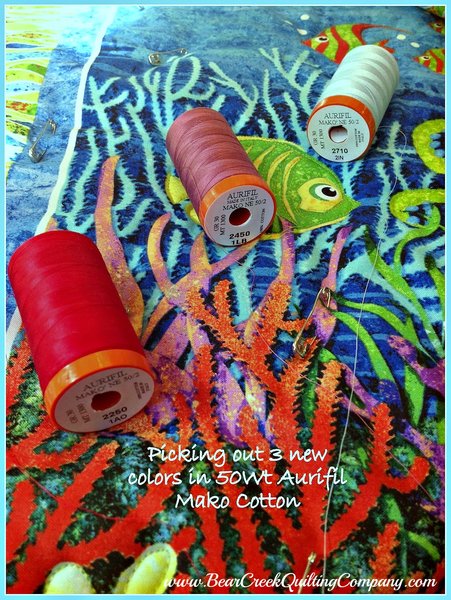 |
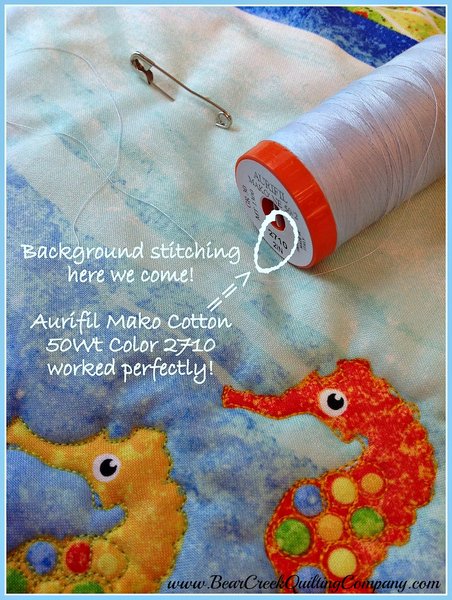
| OK – it’s time to choose colors for the remaining pieces of Sea Coral and Sea Grasses. I chose Aurifil Mako Cotton 50Wt in Colors #2250, #2450 and #2710. I didn’t have these colors in 28Wt, so I used 50Wt. It worked out just beautifully. |
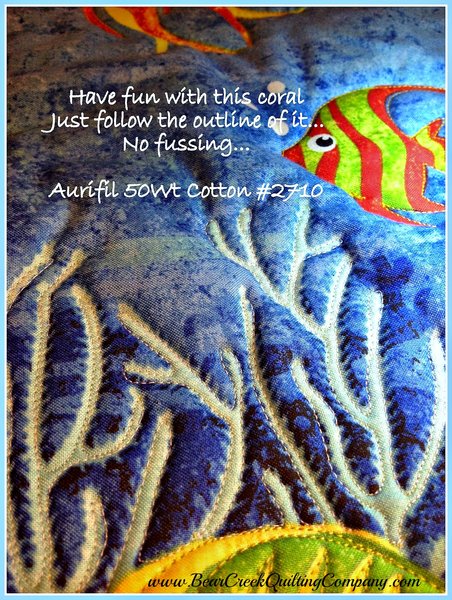 |
| First up, stitch the light color Coral using Color #2710 (Light Robins Egg). Note: If you want the Coral to "pop" -- stitch around the outside of it close to the blue are (you may have to use a different color thread). Stitching on the blue will make the white area "pop". I stitched on the white area which flattened it. |
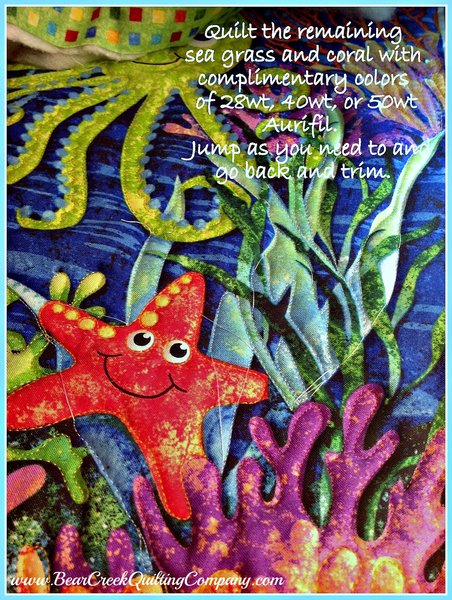 |
| Jump to the Sea Grass near the star and quilt there too – jumping over layered objects as necessary. |
| When you're ready -- change thread colors to the Red or the Rose and stitch corals and grasses as necessary – have fun with it, perfection not required! |
 |
|
Background Fillers: OK – all the major objects are now quilted – lets get stitching the background. Starting with Aurifil 50Wt Mako Cotton Color #2710, we’ll quilt the background at the top of the panel. |
| Note: Large spools of Aurifil thread are meant to be loaded vertically (upright) with the base of the spool to the bottom of the spool holder. If you don't have an upright post, load the large spool the same way as a small spool -- with the thread coming over the top of the spool. |
 |
|
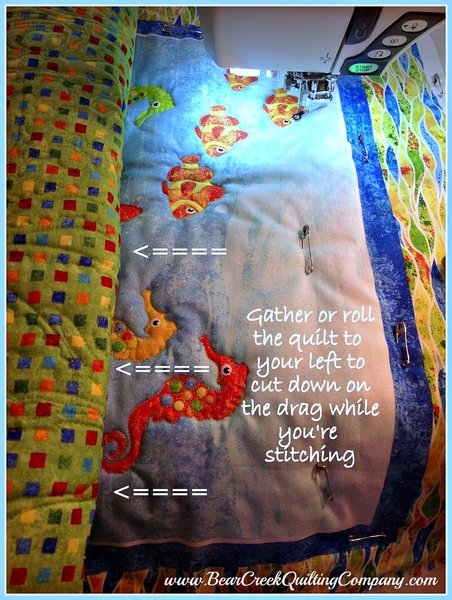
Background Quilting: Lets get started with the large area of white and pale blue at the top right of the panel. Position the quilt so the least amount of fabric is hanging off the edge of your table. You can collect or roll or bunch your quilt to the left. You don’t want the quilt getting hung up on anything, you want it supported by the table if you can. |
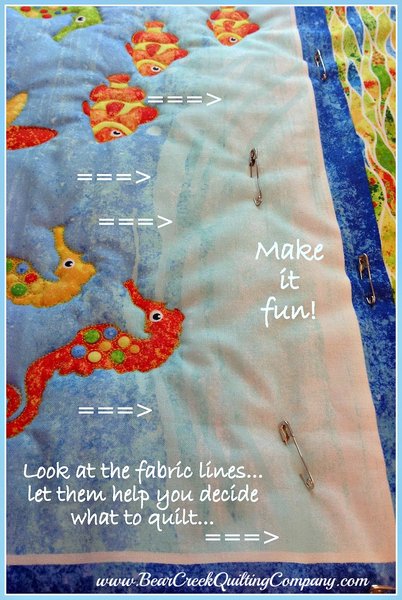 |
| Now, deciding what to quilt: With any panel or pieced block I try to let the design, fabric or object help decide what and how to quilt. This white/pale blue area looked calm to me – I didn’t see a lot of movement but for a bit where the fine shades of blue streaked over the area. So a long and easy movement of stitching will work fine (kinda like the long flowing streaks of blue). |
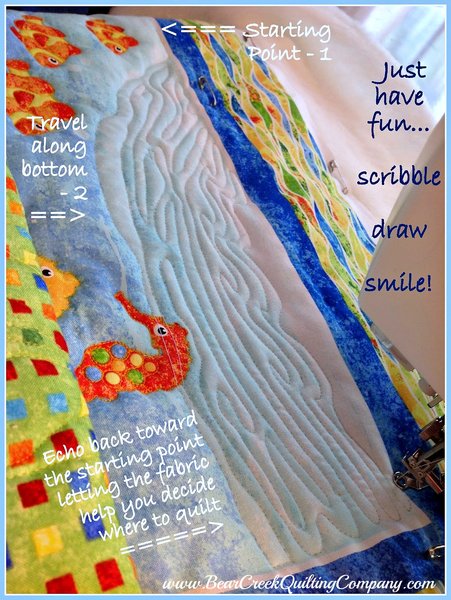 |
| OK – here we go…. Start at the left of panel, bring your bobbin thread up, take a few lock stitches and begin quilting by traveling along the bottom of the white-ish area – "jumping" over the seahorse as you go. When you get to the right end of the panel, work your way back to the starting point, travel a little and head back. Let the value changes in the fabric help you decide what to quilt and where to go next. There is no right or wrong – just have fun with it! |
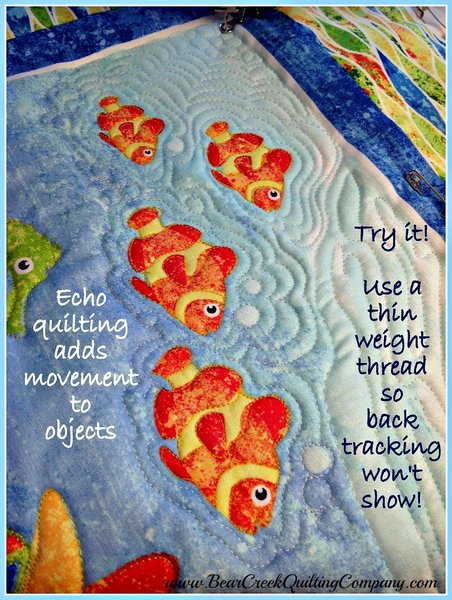 |
| When you finish that section stop and move to the clown fish area. Here, a little echo quilting will give the fish movement – nothing major, just a nice movement. Echo quilt one fish at a time, circling it twice or more and then moving to the next fish. The white bubbles spoke circles or pebbles - work around them in a circular motion… eventually you’ll work your way into the corner. I finished off the corner with some pebbles (or bubbles). Using a 50Wt thread will allow you to backtrack without buildup. |
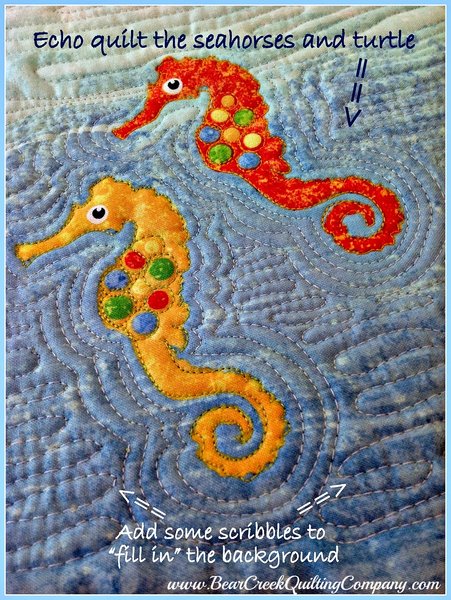 |
| Next, echo quilt the Seahorses and the turtle – and add some scribbles in between as a background filler – just have fun! |
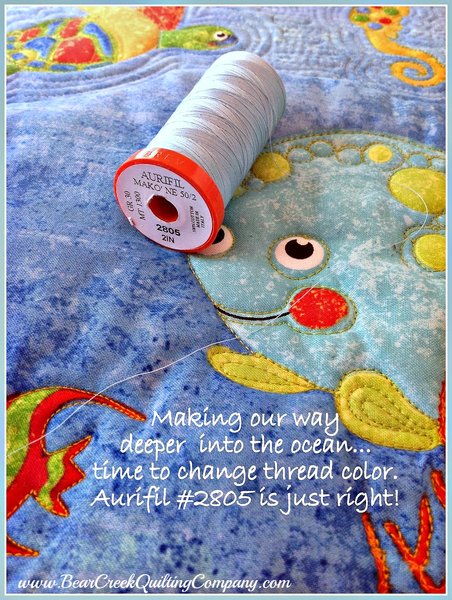 |
| As you move deeper into the panel the background value gets darker. I switched to Aurifil Color #2805 in this area. |
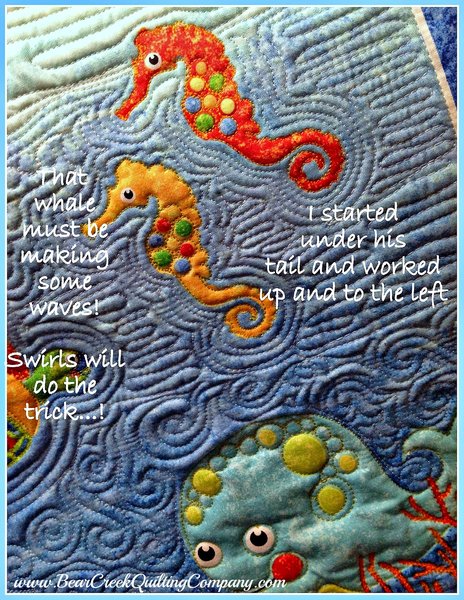 |
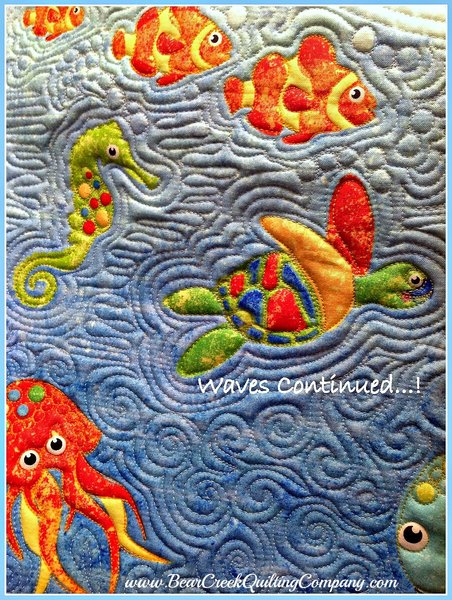
| Ah, the whale is a heavy guy -- he must be making some waves down there! Swirls make fantastic waves. Quilt a large circle from outside to inside, then follow the circle back out. |
 |
| Travel to the left with your swirls, filling in spaces around the whale and toward the squid. Don't worry if it's not perfect -- it will look beautiful when you're done. |
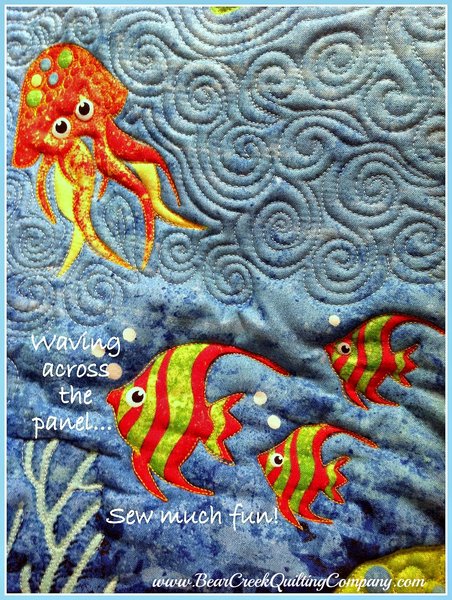 |
| Be sure to quilt around the other side of the squid too! |
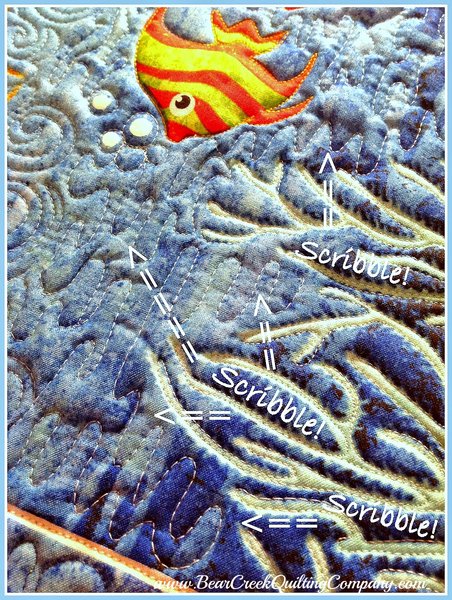 |
| The Angel Fish looked tranquil to me.... Just fill in with some scribbles there and below the Octopus and the Star -- scribble and jump as you need to -- in some areas a darker blue color (Aurifil #2730) blended well. |
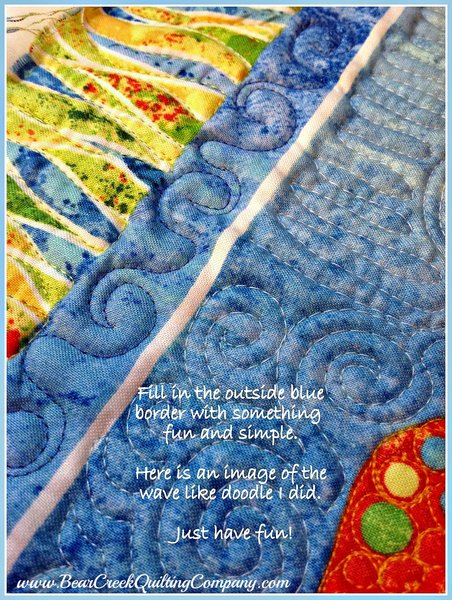 |
| Once you're done with all the background filler it's time to tackle the borders. Borders are sometimes hard to manage as there is less fabric to grasp while you are quilting. Just be patient and take your time. Remember -- this is practice and there is no judging. On the outer blueish border I decided to do little peaked waves with some swirls - you could also do some larger circles or figure 8's or any number of other fun borders. Do something you're comfortable with - draw it out on paper first and trace it with a pencil or your finger until you have a comfort level. |
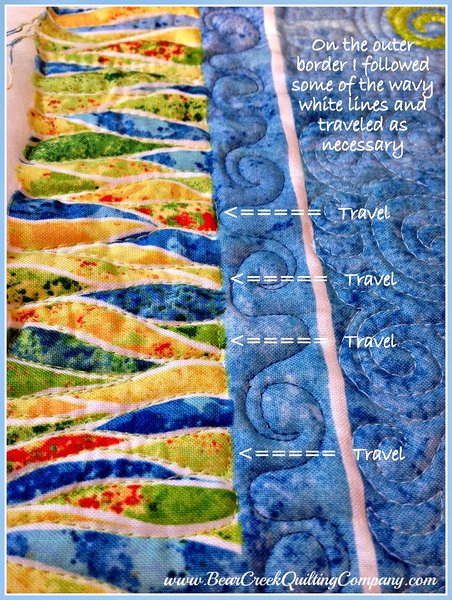 |
| On the outside, multicolored border, I used the Aurifil Mako Cotton 50Wt Color #1231 (same as the bobbin thread) to follow the white lines - traveling on the inside or outside of the border as necessary to pickup another line. This was another case of letting the fabric speak to decide what to quilt. The border fabric is so busy it really just needs something simple. No need to trace every line -- just outline every so often. Have Fun!! |
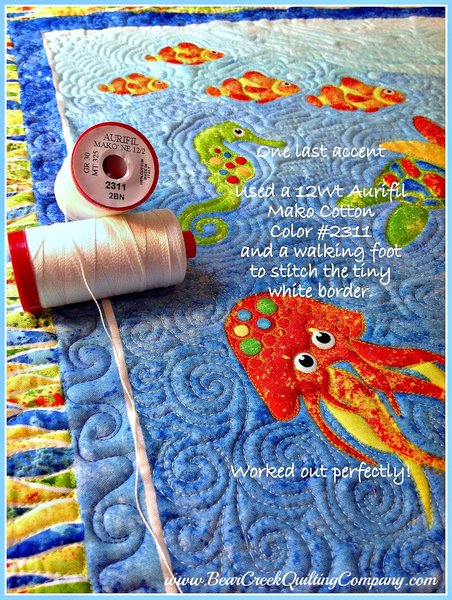 |
| One final accent before we're done quilting -- and I did this with a walking foot. The little 1/8th inch white border was calling out for some quilting. I had this awesome Aurifil Mako 12Wt Cotton thread in Color #2311 and it worked perfectly here. Give some heavier weight threads a try -- I think you'll like it. |
 |
|
Well, now all the quilting is done we'll need to square up, prepare the binding and a sleeve, and get the job finished. |
|
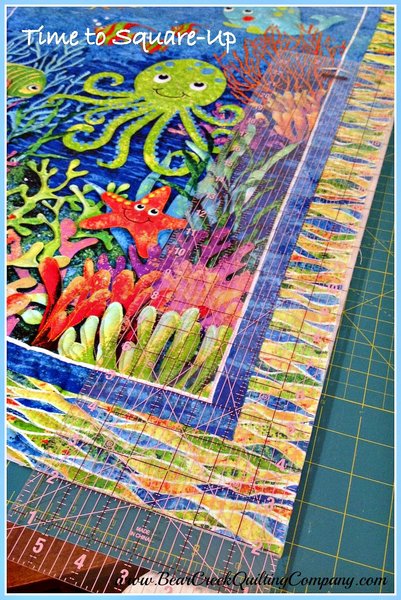
Square Up: Use the longest ruler you have to "Square-Up" your quilt. Keep in mind that dense quilting will draw the fabric in and the panel will be smaller than it was when you started. Do the best you can to make sure the width and lengths are of equal numbers across the quilt. |
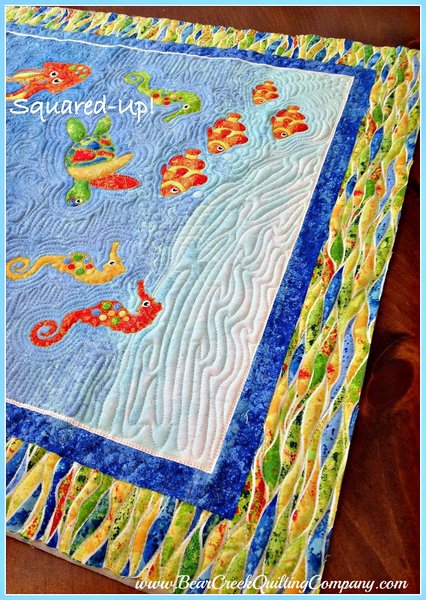 |
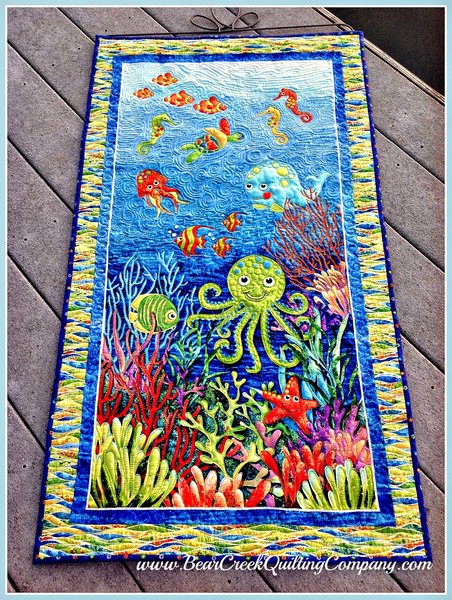
| All Squared Up: The Sample measured 41" x 23" once squared. |
 |
|
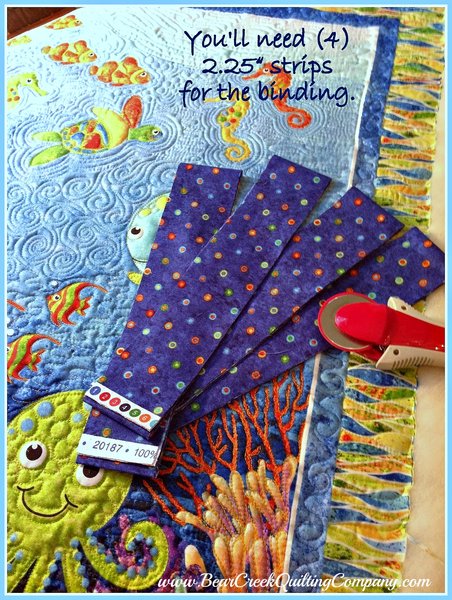
Prepare binding strips: I prefer to cut my binding strips 2.25" wide (Two and a Quarter). You'll need 4 Width of Fabric (WOF) strips sewn together for a total of approximately 165" of binding. You'll have a small amount leftover. If you're unfamiliar with the binding process, there is a tutorial on the Moda Bake Shop that walks you through it. Click here for the binding tutorial.Before you sew the binding to the quilt -- be sure to prepare and attach a hanging sleeve. A finished size of 21" wide worked great for the sleeve and fits a 22" wide hanger perfectly. |
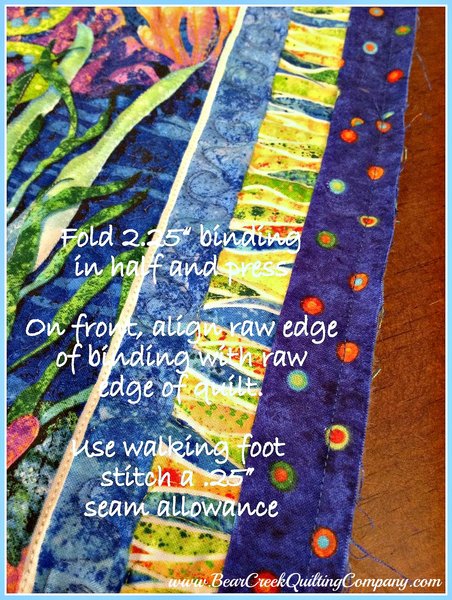 |
| Continuing with the binding: Once you've pinned your sleeve to the top of the quilt, align the raw edges of the binding to the raw edge of your squared-up quilt and attach with a walking foot using a 1/4" seam allowance. Reference the Moda Bake Shop tutorial if you need more information. |
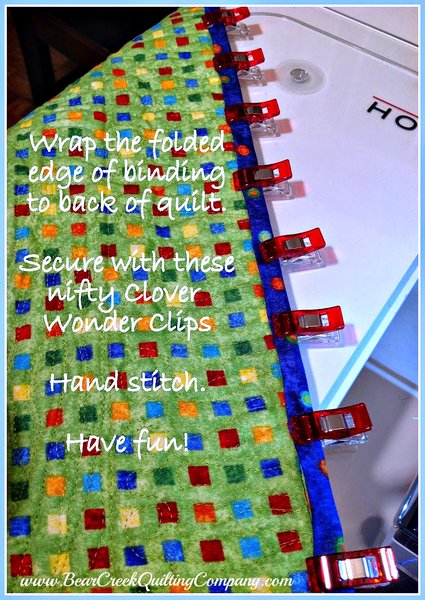 |
| Once the binding is sewn to the front, wrap the folded edge to the back of the quilt and stitch by hand. These nifty Clover Wonder Clips come in handy to hold the folded binding while you sew. You can find a 10 piece package here. |
| Be sure to label your quilt when you're done -- labels are essential when giving a quilt as a gift. |
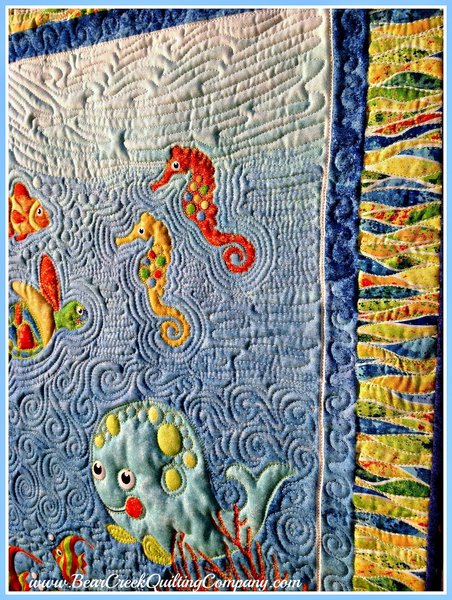 |
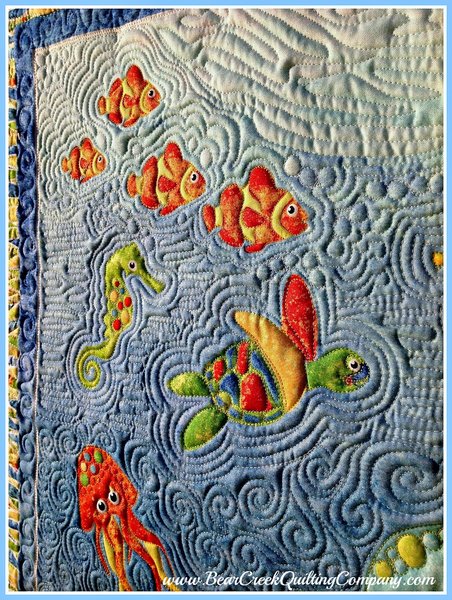
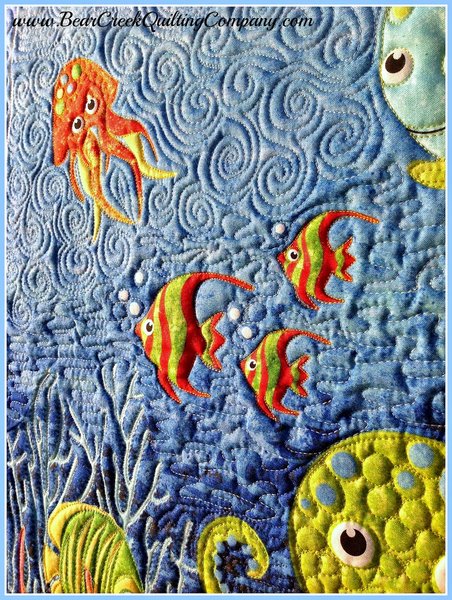
| Here are a few more closeup images of the quilt... |
| Note: There are no right or wrong designs to choose -- just do what is comfortable for you. You can make all different choices than mine and the quilt will be beautiful! |
 |
| Note: Free Motion Quilting should be Fun! We are our own worst critics. Don't be hard on yourself -- accept your quilting at every stage... from beginner to more advanced. |
 |
| Thanks so much for joining me today. If you have any questions please hop over to my blog and let me know! |
 |
|
To celebrate Free Motion Quilting Fun, Bear Creek Quilting Company is sponsoring a giveaway. Hop on over to my blog, Karen's Quilts, Crows and Cardinals, to join in the fun and enter the giveaway! - Giveaway Closed 10/19/2014 |
 |
 |
| Free Motion Quilting Fun Tutorial was designed and created for Bear Creek Quilting Company by Karen from Redbird Quilt Co. and Karen’s Quilts, Crows, and Cardinals blog. |
| Fabric used in this tutorial is from Undersea Adventure by by Linda Ludovico for the Northcott Stonehenge Kids Collection. |
| Do you love free fabric? Do you love to teach? Want to be a contributor on our blog? Send us an email at web@bearcreekquiltingcompany.com to get started! |



Comments