Tiles Quilt-Along, Part 1


Article Archive

+  2024 (12)
+  2023 (37)
+  2022 (27)
+  2021 (16)
+  2020 (16)
+  2019 (32)
+  2018 (15)
+  2017 (9)
+  2016 (3)
-  2015 (23)
+  2014 (37)
+  2013 (2)


Welcome!

Hello and thank you for stopping by. We hope you will find this blog site full of great tutorials and creative ideas for your upcoming projects.

Bear Creek Quilting Company

2023 Maywood Studio Maker
I am a 2023 Maywood Studio Maker!
Posted by Shari on June 14th, 2015

Tiles Quilt-Along, Part 1:  Gather Your Supplies
Hello Friends, my name is Karin and I am visiting from Cascade Quilts blog.  I am happy to bring you my very first quilt-along!

Tiles Quilt-Along
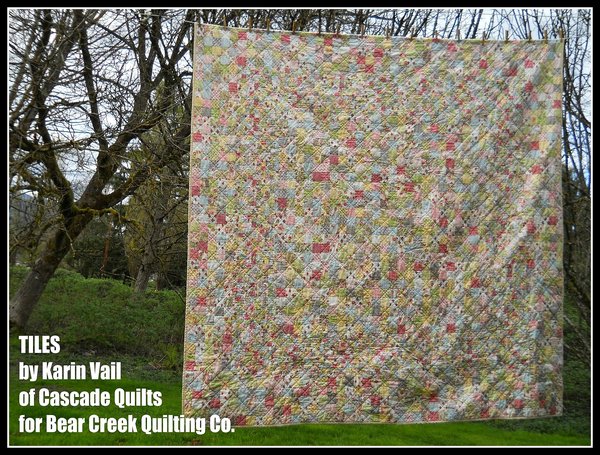
 The quilt I will be featuring was inspired by a tiled floor, so I aptly named it ''Tiles''.

Tiles finishes at 90''x90'' - the perfect size for a queen size bed in my opinion.

Tiles Quilt Along
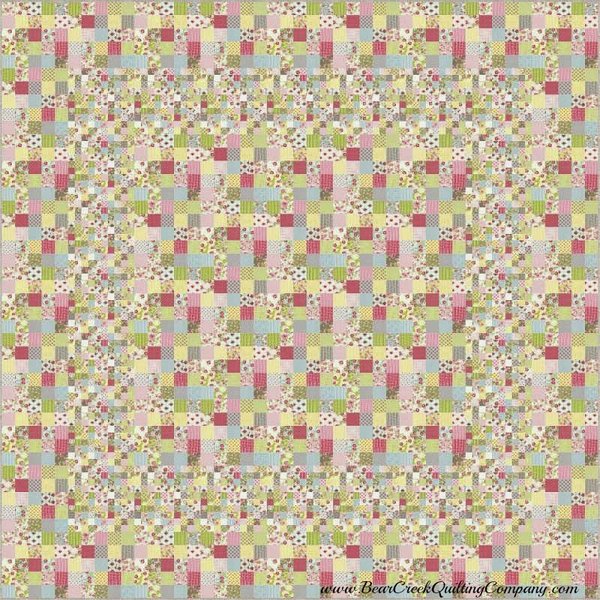
Tiles is a combination of 2 inch finished squares and 1 inch finished squares, and I chose to use 'low volume' prints for my quilt.  

Don't be afraid of those 1 inch finished squares though - if you can do a scant 1/4 inch seam allowance, you CAN do this!  

I will be using a strip piecing construction which makes things go smoothly and I will be giving comprehensive cutting, piecing, and pressing instructions so all your seams will nest so you get perfect matching points.

I think Tiles would be fabulous alternating prints and a solid too - the 1 inch squares would stand out a bit more that way!  I am considering making another quilt during the quilt-along and making it from my stash.  Hop on over to Cascade Quilts and I will share two different layout variations using alternating solids.

Tiles Quilt Along
We will use the first week in the Quilt-Along to gather supplies.  

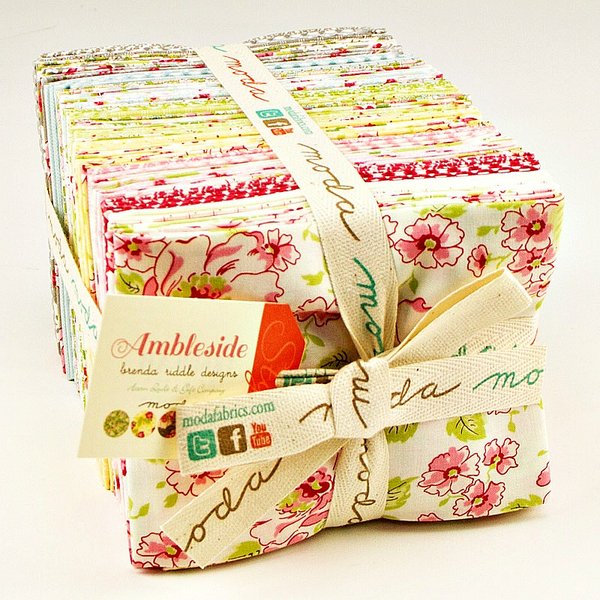
This pattern requires 40-44 fat quarters.  Please, read carefully!  I chose to use a fat quarter bundle (FQB) of Ambleside by Brenda Riddle Designs for Moda.

If you use Moda precut fat quarters (FQ), they are a generous 18 1/2 inches wide and you will be able to get all of your pieces cut from a 40 piece fat quarter bundle.  

If you choose other fat quarters, you might not be able to get all of the pieces you need.  If they are under 18 1/2'' wide, you will need to add another additional 4 fat quarters to be able to get all the pieces necessary for the pattern.  If you are unsure, start with the additional 4 fat quarters (or one yard total) ''just to be safe''.

Supplies List:
  • 40-44 Fat Quarters (or 10 yards)
  • 2 3/4 yards wide quilt backing (or 5 1/4 yards at 44 inch wide + scraps from the front for a pieced backing will work as well)
  • 3/4 yard binding (I used the cut-offs from the wide backing to use as my binding)
Tools List:
  • rotary cutter

  • rotary cutting mat

  • quilting ruler (I used a large Shape Cut ruler - this ruler is *excellent* for strip quilting.  If you don't have one, I highly recommend it!)

Note:  If you want to alternate a solid in the entire quilt, the fabric requirements are:

  • 22 Fat Quarter prints (or 5 1/4 yards); (20 if you use Moda precuts or your FQ's are at least 18.5'' wide)

  • 5 1/4 yards solid

Note:  If you want to alternate a solid in JUST the 2'' squares, the fabric requirements are:

  • 30 Fat Quarter prints (or 7.5 yards)

  • 3.5 yards solid

So, start gathering your supplies and watch for the next post in a week where we will start cutting into those fat quarters!

I have started a Flickr group to share your pictures if you plan to join in the quilt along!  https://www.flickr.com/groups/2827925@N23/  is the link to the group.

Karin at Cascade Quilts
"Tiles" Quilt-Along, Part 1 instructions can be printed here.
"Tiles" Quilt-Along was designed and created for Bear Creek Quilting Company by Karin from Cascade Quilts.
Fabric used in this tutorial is from Ambleside  by Brenda Riddle Designs for Moda.
Do you love free fabric?  Do you love to teach?  Want to be a contributor on our blog?  Send us an email at web@bearcreekquiltingcompany.com to get started!
 
Category: Tutorials

Comments

  • 1. Posted by Michiele A Ogden on June 15th, 2015 at 3:18 p.m.
    Hi Karin Looking forward to doing "Tiles". Thank You
  • 2. Posted by Judy on June 15th, 2015 at 12:16 p.m.
    Karin: I LOVE tutorials with pressing directions, as I really try to get my seams to nest and match. This should be a lot of fun!
  • 3. Posted by mary on June 14th, 2015 at 9:58 p.m.
    Hi I'm ready Karen Looking forward to this quilt-along I like the name and the quilt Thank's for your time and this project
  • 4. Posted by Kathy on June 14th, 2015 at 8:18 p.m.
    Hi Karen, I purchased two fat quarter bundles recently - looking forward to getting started. Thanks!
  • 5. Posted by Brenda on June 14th, 2015 at 4:54 p.m.
    This will give me a chance to use all of my FQ's thanks.
  • 6. Posted by Kathy on June 14th, 2015 at 2:29 p.m.
    Bought a FQBundle a couple of years ago while passing through Georgia been waiting for a good idea to use it. Thanks Kathy
  • 7. Posted by louise on June 14th, 2015 at 2:28 p.m.
    that will take forever 2 make...I like something quick,........getting old-, no already old. haaaaaaaaaa
  • 8. Posted by Linda on June 14th, 2015 at 12:36 p.m.
    Just the quilt to use some of my 2" blocks Thanks.
  • 9. Posted by Wendy on June 14th, 2015 at 12:31 p.m.
    Hi, if we choose to use a solid to alternate between the prints, how much would we need? Thanks!
  • 10. Posted by Maryann Zuk on June 14th, 2015 at 12:18 p.m.
    Hi Karen, I also am looking forward to doing "Tiles" I have so many bins of different sizes of strips that I will certainly try this one.
  • 11. Posted by Debby on June 14th, 2015 at 12:16 p.m.
    Hello Karin, I'm excited to join, this will be a first for me. Your quilt is beautiful. Can't wait to get started! Thanks for sharing. Debby
  • 12. Posted by Jennifer on June 14th, 2015 at 11:45 a.m.
    Hi Karen I look forward to attacking my growing stash, thank you! Cheers, From Perth Australia